How to Replace Damaged WPC Panels Effectively?
Replacing damaged WPC panels can seem daunting. However, with the right guidance, it can be a manageable task. WPC, or wood-plastic composite, is popular for its durability and aesthetics. Yet, wear and tear can occur, leading to the need to Replace Damaged Wpc Panels.
Understanding the process is vital. Each step requires careful attention to detail and proper tools. You might encounter challenges like stubborn nails or mismatched colors. These moments can be frustrating but are also opportunities for learning. Assessing your skills objectively helps you decide if you should tackle the project yourself or seek professional assistance.
Equipped with the right knowledge, you’ll find that replacing damaged WPC panels can restore your space beautifully. Achieving a seamless look takes patience and precision. This guide will provide practical tips and insights, ensuring that you can confidently replace damaged WPC panels when necessary.
Understanding WPC Panels and Their Common Damages
WPC (Wood Plastic Composite) panels are popular for their durability and versatility. These panels combine wood fibers and plastic, making them resistant to moisture, insects, and decay. However, they are not immune to damage. Common issues include fading, warping, cracks, and surface abrasions. According to industry reports, about 30% of WPC panel failures occur due to environmental stressors like UV exposure and extreme temperatures.
Damage to WPC panels often manifests visually. Discoloration can occur after prolonged sunlight exposure. Warping may happen with excessive heat and moisture changes. Cracks can develop from heavy loads or improper installation. A study by a renowned materials association states that roughly 20% of WPC panel installations face some form of degradation within their first five years. Regular inspection and maintenance can mitigate many of these issues, yet many homeowners overlook this crucial step.
Understanding these common damages is essential for effective repair and replacement. Knowledge of how WPC reacts to environmental elements can guide homeowners. For instance, applying UV-resistant coatings could extend the panel's life. Ignoring the signs of damage may lead to more significant structural problems. Being proactive can save time and money in the long run.
Tools and Materials Needed for Panel Replacement
When replacing damaged WPC panels, having the right tools and materials is crucial. Begin with protective gear such as gloves and safety goggles. You’ll need a saw specifically designed for cutting composite materials, which ensures clean edges. A high-quality level will help maintain accuracy while installing the new panels. Not having the correct measuring tools could lead to mistakes, making the process frustrating.
Gather essential materials like replacement WPC panels, screws, and brackets. Choose screws that are suitable for composite materials to avoid stripping. Having a good adhesive can also be beneficial, especially in areas that require extra support. Don’t forget a drill for more efficient installation. It's important to have a few spare screws and brackets in case of mishaps during the process.
Consider keeping a repair kit handy for future issues. It can include extra screws and small tools. Reflect on your previous experiences; perhaps you faced challenges with cutting or measuring. Documenting these lessons can help improve your technique over time. Remember that even with preparation, unexpected complications can arise. It's all part of the learning experience.
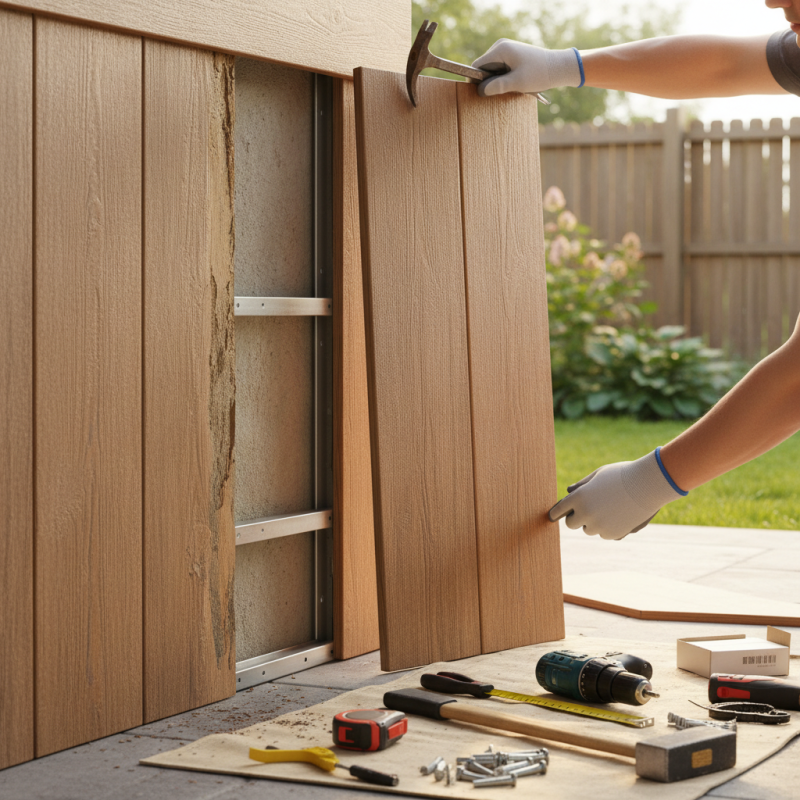
Step-by-Step Guide to Removing Damaged WPC Panels
When dealing with damaged WPC (Wood Plastic Composite) panels, careful removal is key. Inspect the panel for screws or fasteners. Use a screwdriver to remove any visible attachments. If the panel is glued, a utility knife can help cut the adhesive. Be gentle to avoid damaging surrounding panels.
For extra safety, wear gloves and goggles before starting the removal. This protects you from sharp edges and debris. It’s crucial to handle the panels delicately. A mistake may lead to additional damage. Consider documenting each step with photos. This helps in the reinstallation process.
After removing the damaged panel, prepare the surface for a new panel. Clean the area to remove dust and debris. This ensures proper adhesion for the new panel. Before installing a new one, double-check the dimensions. A careful measurement avoids a misfit, which can be frustrating later. Embrace the learning process. Each replacement teaches you more about WPC panel maintenance.
WPC Panel Replacement Efficiency
Installing New WPC Panels: Best Practices and Tips
When installing new WPC (Wood Plastic Composite) panels, following best practices can significantly enhance the outcome. Begin with accurate measurements of the area to ensure that the panels fit perfectly. Cutting panels to fit uneven spaces can be challenging and may require the use of specialized tools. Always wear protective gear while handling power tools.
It's essential to prepare the surface properly before installation. Clean the area thoroughly, removing any debris, old paint, or adhesive. Uneven surfaces can lead to future installation issues. In some cases, you might need to sand down the surface. This could save you time later.
Tips: Use a level to check the surface. This prevents panel warping. If necessary, add shims to achieve a level foundation. Additionally, ensure that you leave adequate gaps between panels for expansion. This might seem like a minor detail, but it can prevent warping during temperature changes. Don’t rush the installation process. Taking your time can lead to better results.
Finishing Touches: Sealing and Maintaining New Panels
Sealing and maintaining new WPC panels are crucial for their longevity. WPC, or wood-plastic composite, is known for durability. However, improper care can lead to damage over time. According to a report by the National Association of Home Builders, improper sealing can reduce panel lifespan by up to 30%.
Applying a quality sealant is essential. Choose a product that suits WPC. The sealant should provide protection against moisture and UV rays. Regular application, ideally once a year, can help prevent fading and mildew. A study by the American Coatings Association emphasizes that proper sealing boosts performance by enhancing resistance to wear and tear.
Maintaining WPC panels involves more than just sealing. Regular cleaning is vital. Use gentle, non-abrasive cleaners. Even small particles of dirt can be abrasive. This prevents surface scratches and can significantly impact the panel’s appearance. Not considering environmental factors, like rain or sunlight, may lead to unexpected wear. The key is to develop a maintenance routine that addresses these aspects comprehensively.
How to Replace Damaged WPC Panels Effectively? - Finishing Touches: Sealing and Maintaining New Panels
| Step | Description | Tools Required | Sealing Method | Maintenance Tips |
| 1 | Assess the damage to the WPC panel to determine if it can be repaired or needs replacement. | Inspection tool, measuring tape | N/A | Regular inspections every 6 months. |
| 2 | Remove the damaged panel carefully using appropriate tools to avoid damaging adjacent panels. | Screwdriver, pry bar, safety gloves | N/A | Use a soft cloth to clean debris from the area. |
| 3 | Install the new WPC panel, ensuring it fits properly with existing panels. | Hammer, screws | Sealant or adhesive for WPC | Clean off any excess sealant immediately. |
| 4 | Apply a sealant to protect the new panel from moisture and UV damage. | Brush or roller | Water-based sealant | Reapply sealant annually. |
| 5 | Conduct a thorough cleaning and maintenance check after installation. | Soft brush, mild detergent | N/A | Keep the area free of debris and regularly wash the panels. |